Just a little ole working gal, who loves food

Thursday, October 25, 2012

Stuffing! Why do we only make this during the holidays?

I swear...Stuffing is delicious...why only make it once or twice a year?
This stuffing recipe has a few non traditional elements to it...which ends up making it super decadent!!

I start off with 2 links of Spanish Choritzo, chopped! Throw this into a heavy bottomed pot and start rendering the fat. (Medium Heat)
 After about 5 minutes of cooking the choritzo I add 1 Cup each of Chopped Onion and Celery. Stir this up and let the onions start to brown.
 Next add 1 1/2 Cups sliced mushrooms.
 Once the mushrooms are cooked through I add 3 Cloves Minced Garlic and about 3 Tbsp of butter.
 Last step, add about 5 Cups of chopped stuffing bread, 1 Cup chopped pecans, 3 Tsp minced fresh sage, 1 Tsp Savory and 1 Tsp chopped thyme. Cover this mixture in about 1 cup of turkey broth (just boil the giblets and neck that come with the turkey in water for about 25 minutes...voila...turkey broth) and stir to combine...add salt and pepper at this point to your liking. The mixture should be wet but not soupy. Depending on the bread you use you may want to only add small amounts of the broth at a time and mix until you get your desired texture for stuffing.
 Stuff your turkey! If you are not stuffing the turkey and cooking the stuffing on the side...add about 1/2 cup more broth to moisten it a tad more.
Realllllly bad picture of the stuffing when it came out of the bird. Sorry...there were about 6 people in my tiny kitchen at this time!

Yeah this is late....but just in time for my American Readers!

I know I promised my recipes for my thanksgiving dinner...and they are coming...today actually. So Canadian readers, save this for Christmas...US readers...I got you just in time! This first post is really 2 recipes in one. First is my recipe for homemade veggie stock and second is the brine for my Turkey. I make the veggie stock from scratch for my brine because A) I have lots of veggie scraps when I am prepping for a large dinner and B) cause its excellent to have in the fridge!
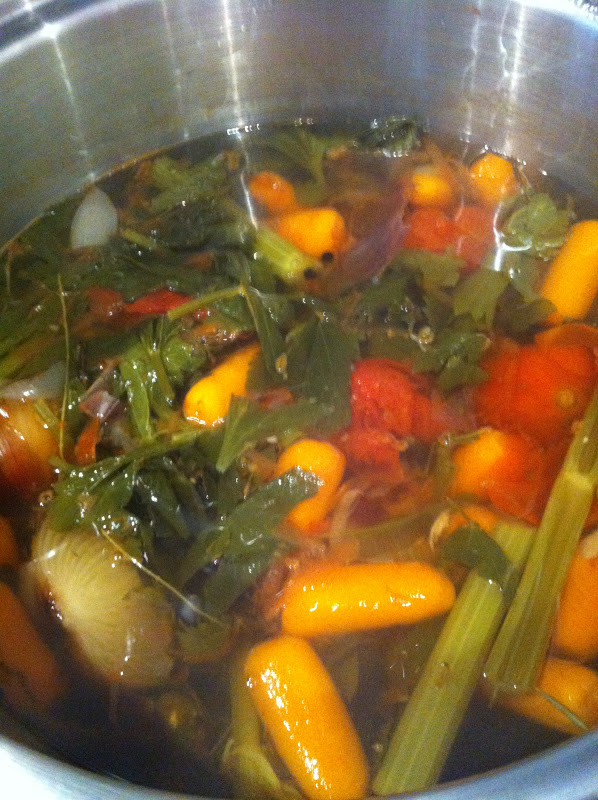
In a giant dutch oven add all your veggie scraps (Carrot shavings and some carrots, celery leaves and celery stalks, Onions sliced in half with skins and all, 5 Cloves of garlic smashed, skins too, 5 Tomato's whole, a couple tbsp of Black Pepper whole, 3 Bay Leaves, a huge handful of fresh parsley, some fresh rosemary and some fresh thyme) Then fill up the dutch oven with water until all the vegetables are covered and add a generous dose of sea salt. There is no measuring with this...just dump handfuls of everything until the pot is full!

 Let this simmer on low for about 4 hours....letting all the flavours of the vegetables get acquainted and yummy. Once cooked let this come to room temperature and strain through a colander.
 In a large food grade container (I used my cooler!) add all of the cooled veggie stock, 2 Cups Sea Salt, a handful of each Fresh Sage and Thyme. Mix until all combined.
 Add the Turkey to the container and cover it in Ice. Close and keep in a cool place overnight (in our case we kept it outside...it was freeeeeezing up here!
 When you are ready to cook the turkey the next day, remove it from the cooler and pat it dry. Rub the skin with softened butter and season with salt and pepper.
 Stuff your turkey!!! (Stuffing recipe to come next!) Your Turkey is ready to bake!!
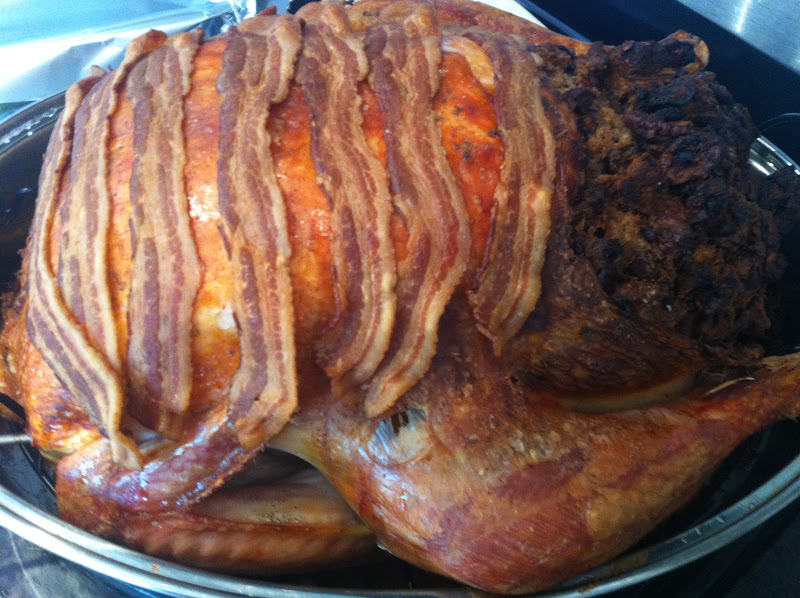
At about the half way point I usually cover the bird in strips of bacon for even extra flavour...Keeps the breast moist and gives the stuffing that little extra salty bacony goodness that it needs!!
Next up...Stuffing!!!
 

Tuesday, October 9, 2012

I've been busy....

I've been busy...hense the bad posting patterns...but its been busy cooking!!
Lots of new recipes coming up as well as some staples that everyone should have!!

This past weekend we celebrated Canadian thanksgiving. It was a weekend of lots of butter, cream and fat...the good stuff really. We had a meal at my in-laws home on the lake, which was wonderful since we got to see the beautiful fall colours and a lovely sunset despite the bad weather most of the day:

Bliss!

But after coming home from the lake house I needed to roll up my sleeves and cook until I couldn't feel my hands anymore. Obviously I am being wayy over dramatic...but it was a serious amount of food! Recipes to follow over the next few weeks, in the meantime here is a photo montage to get you salivating!

Brined bacon covered turkey with dressing

Green Bean Casserole with Crispy Shallots
 

Thyme Roasted Sweet Potatoes

Roasted Brussel Sprouts with Bacon and Onions

Sour Cream and Chive Mashed Potatoes

I have made this dessert and posted it on the blog before...but it is always a crowd pleaser during the holidays and is always the first dessert to go! Plus its super pretty! Link below!
 
I hope all my Canadian readers had a wonderful thanksgiving!

Monday, September 24, 2012

Israeli Cousous YUM!

OK...this stuff is soooo good! Its like pasta...but its not..but it is! Easy to make, fast and absorbs lots of flavour!!!
 They look like little pearls.
 Take your Israeli couscous and cook according to package instructions making sure to use Chicken or Vegetable stock instead of water. Set aside.
 In a large sauce pan I sauteed about 2 cups chopped mushrooms with 1 Tbsp butter, 1 Garlic Clove and 1/2 Tsp Chili flakes. Season with salt and pepper
 Add 3-4 cups chopped rapini or spinach. Allow your greens to wilt and cook down...seasoning again if needed.
 Added your cooked Couscous
 Stir to Combine and serve!
My new fave side dish!!!
I tried it last night with leftover Spaghetti Meat Sauce and it was so perfectly yummy.
Why haven't I eaten this before!!!
 

Monday, September 17, 2012

Greek Style 7 Layer Dip

This recipe was an experiment of sorts. I wanted to try something different instead of the usual Mexican 7 layer dip that appears at every single party. Now don't get me wrong...there is nothing wrong with 7 layer dip...its delicious and has a lot of my favourite flavours all melded together. But I wanted to try something a little different....unfortunately this dip does not refrigerate well...it must be made fresh and eaten right away...mostly due to the tomato's and cucumbers releasing a lot of water. Otherwise...its pretty tasty!
In a large deep bowl start your layers with some hummus.

 Fresh chopped tomato
 Chopped Cucumbers
 Chopped Red Peppers
 Chopped Red Onion (I wish I used less and finely minced this sucker)
 Chopped Feta cheese
Top with Tzatiki (I bought store made Tzatiki) and top with some kalamata Olives.

I served this dip with fresh Pita cut into triangles and baked with fresh parsley, olive oil and sea salt.


Monday, September 10, 2012

Mexican Style Baked Pasta Shells

TexMex is such amazing comfort food for the fall...its usually pretty spicy and hearty and easy to make. I have no idea who came up with this brilliant idea...but after seeing multiple posts about it on Pinterest I had to make some Mexican pasta shells myself!
 
 In a large saucepan brown 1 lb of ground extra lean beef with 1 chopped onion.
 Add 1 Package taco seasoning (or make your own with Chili Powder, Cumin, Onion & Garlic Powder, Salt and Pepper) 1 Can Corn and 1 Can of Black beans. Let this all simmer up and set aside to cool until it is easy to handle.
 Cook 1 large box of Extra Large Pasta shells until Al dente...do not overcook these as they will continue to cook in the oven. Rinse with cool water so they are easy to handle.
 For the sauce I made THIS enchilada sauce. It was fantastic and super quick to make! Ladle a couple some sauce on the bottom of a lasagna pan and start stuffing your shells with the meat mixture.
I squished the whole box of shells into this lasagna pan.

 Ladle some more enchilada sauce over all the shells and cover in lots of sharp cheddar cheese.
 Pop in a 375F oven for about 30 Minutes or until the cheese is all bubbly and melted.
Serve with fresh chopped green onion and a dollop of sour cream. Excellent for Potlucks!

Tuesday, September 4, 2012

Last taste of Summer....

I really can't believe its September already. Really, where has this year gone? I am a HUGE fan of summer and am sad to see the days getting shorter and the evenings cooling off. However, I am a runner and I absolutely LOVE running in the fall months!! So at least I have something to look forward to!!

On the blog today is one of my last summer recipe's I have been hoarding...probably should have posted it back in June when strawberries are in season, but this recipe can be catered to any type of fruit you like!

Strawberry Napoleons


Ingredients:
1 Package Frozen Puff Pastry
1 Quart Ripened Strawberries (or other berry)
1 Package Instant Vanilla Pudding
1 Tsp Almond Extract
Sliced Almonds
 1 cup fresh whipped cream
 
Thaw your puff pastry and roll out. Cut pastry into 4 inch wide strips and bake according to package directions until puffed and brown.

 Seriously...why go through all the trouble making this when the frozen stuff works just fine!!
 Cut your strips into squares once cooled and set aside.
 Prepare your instant pudding according to package directions adding the almond extract as well.
 fold in your 1 cup of whipped cream very gently, being careful to not over mix.
 Now its time to assemble! Take 1 Puff Pastry square and sprinkle some almond slices over it.
 Add a large dollop of the pudding mixture followed by some sliced strawberries. Repeat this process one more time.
Garnish with more sliced almonds. A showstopper dessert that is super easy!!