Just a little ole working gal, who loves food

Showing posts with label Dessert. Show all posts

Monday, June 18, 2012

Banana Bread

We usually don't let Banana's go bad in our household since they are a staple in our breakfast smoothies (That recipe to come next week!)...but once in a while...we will head up to the cottage for the weekend and forget about the fresh bunch of banana's at home. Then we get back and they are brown and overripe. That's when I chuck the bunch in the freezer and wait for a time when we crave some banana bread!! Here is my go to recipe!

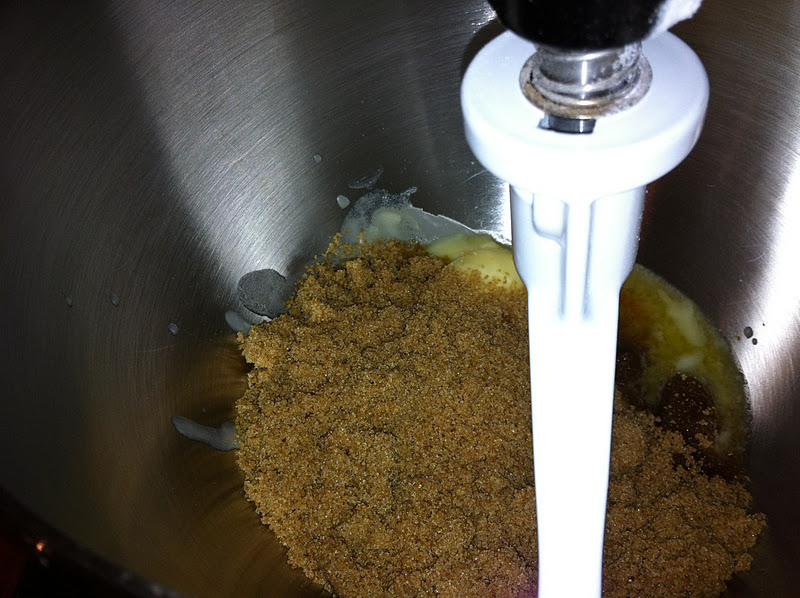
In your mixer add 1 Cup Packed Brown Sugar, 2 Eggs and 1/2 Cup Melted Butter

Add 1 Tsp of Vanilla and a 1/4 cup of 2% Milk...start to Mix on medium speed.
In the meantime combine your dry ingredients in a bowl. 1 1/2 Cups All Purpose Flower, 1/2 Tsp Salt, 1 Tsp Baking Powder, 1 Tsp Baking Soda, 1 Tsp Cinnamon and a pinch of nutmeg.

Your wet ingredients should be combined by now and creamy

Stop the mixer and add about 2 Cups of Mashed up bananas...these were from the freezer...I let them defrost then mashed them up in a bowl. Combine the banana's into the wet ingredients by hand.

Now fold the wet ingredients into the dry ingredients until combined.
Pour mixture into a greased bread pan (grease with butter...its better!)
Top with a mixture of Brown sugar, chopped pecans and chopped walnuts.
Bake at 350F for about 45-50 minutes or until a toothpick comes out clean. Allow bread to rest for about 15-20 minutes in the oven with the door wide open. Letting it cool down slowly.
Slice and serve..preferably with more butter.

Thursday, March 15, 2012

A WINNER and a Recipe!

Congratulations to:


Michelle!

Michelle selected Seafood Gumbo as her favourite weeknight dinner...one of my faves as well!!! Congratulations Michelle, please e-mail iamwomanwatchmecook@gmail.com to claim your prize!

This weeks recipe was inspired by a PIN I saw on PINTEREST. One of my new obsessions for finding recipe ideas! (In case you want to follow me on Pinterest..my user name is colemania)

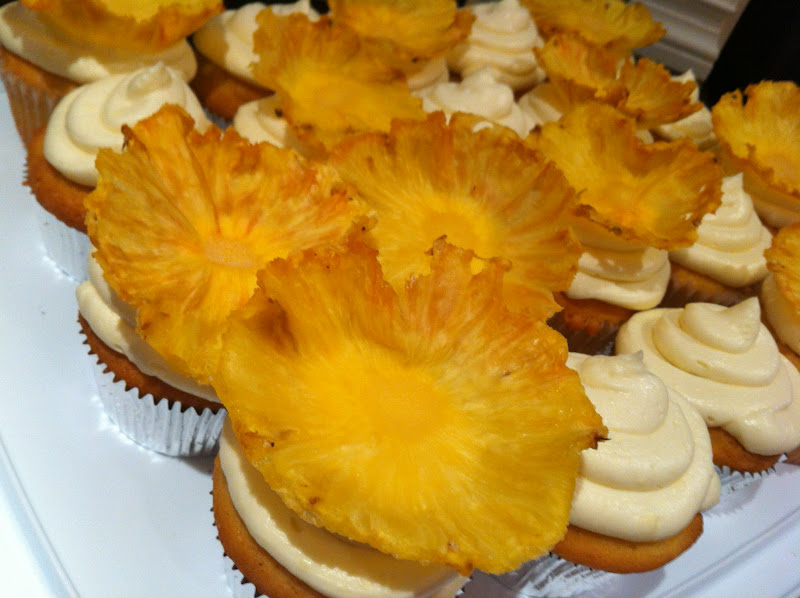
The Pin I saw contained these beautiful cupcakes adorned with what looked like yellow flowers...when in fact they were dried pineapples!! I had to make these!!
So out came my recipe for Pineapple/Coconut Cupcakes with creamcheese frosting!!

Step 1: The Pineapple Flowers
First find a nice and ripe pineapple. Carefully cut the skin off the pineapple...leave the core intact.

Using a sharp knife or small measuring spoon, remove all the brown spots left behind. The holes end up giving the edges of the 'petals' a nice effect.

Using a very sharp knife, slice very thin slices of pineapple. Arrange the slices on a parchement paper lined baking sheet. Bake in a 225F oven for about 1.5 hours, making sure to flip the slices at the halfway point. You may need less or more time depending on your oven.

Once the pineapple slices have dried out and the edges start to brown, remove them from the oven and place each slice in a muffin tin, lightly pressing down the middle. I threw them back in the oven for about 20 minutes to dry out a little more in the tins, then placed the tins in the fridge overnight to set.


STEP 2: Cupcake Mix


In your mixer cream 1 1/2 Cups room temperature butter with 2 cups of granulated sugar on high speed. This mixture should get light and fluffy in about 5 minutes.


Meanwhile, combine your dry ingredients: 3 Cups sifted flour, 1 tsp baking powder, 1/2 tsp baking soda and 1/2 tsp salt. Set this aside for now.


Turn your mixer down to low and slowly add 5 eggs at room temperature 1 at a time. Make sure to scrape the bowl down after each addition. Add 1 1/2 tsp of Pure Vanilla Extract and 1 1/2 tsp of Almond Extract. Mix until combined.


In parts, alternate adding the dry ingredients and 1 cup of buttermilk to the mix. Once all have been added to the mixture, make sure you only mix until combined. DO NOT overmix this batter!

By hand, fold in 1 cup of unsweetened shredded coconut.

Spoon mixture into cupcake pans

Bake for 25-35 minutes or until the tops turn a nice golden brown as pictured above!
Allow cupcakes to cool completely.

STEP 3: PINEAPPLE FILLING

While the cupcakes are cooling you can prepare your pinapple filling.
In a saucepan combine 2 eggs + 2 egg yolks, 2 1/2 cups pure pinapple juice, 3/4 cups of granulated sugar over medium heat. Whisk to combine. Then add about 3 - 4 tablespoons of cornstarch.


Slowly whish the mixture until it starts to thicken (about 10 minutes). Remove from heat and cool. I kept mine in the fridge until I was ready to frost the cupcakes.


When the custard filling was completly cold I used a piping bag with a narrow tip to pipe the filling into the cupcakes.

STEP 4: Creamcheese frosting

For the creamcheese frosting combine 1 pound creamcheese at room temp with 1 1/2 cups of butter (also at room temp) and 1 tsp Pure Vanilla extract. Cream on low speed until smooth. Slowly add about 2 cups of Sifted Icing Sugar, adding until mixture is smooth and sweet to your taste.

Don't forget to lick the bowl!

Pipe the frosting on the cooled cupcakes

Decorate with Pineapple Flowers!!

And there you have it!! A dessert almost too pretty to eat!!


Tuesday, January 3, 2012

Apple Cheesecake Tart with Salted Caramel

Happy New Year Readers!!

I hope that the holidays were good to you (but horribly bad on your waistline!) I have a lot of catching up to do with posting recipes...most of these coming up in the next couple of weeks are from the holiday season. After the catch up you will notice a much healthier theme...since my new years resolution has me back on the fitness wagon. I really felt every single one of the cookies I ate over the holidays with my first 2012 workout last night...ugh!

This Apple Cheesecake has the best of all worlds..tartness from the Granny Smith Apples, Sweetness from the Fuji Apples, Creaminess from the Cheesecake filling and sweet and salty from the Salted Caramel.


 For the Crust Combine 1 1/4 Cups Pastry Flour with 1 Tsp Brown Sugar and 1/2 Cup of Cold butter cut into cubes.
 Using your hands break apart the butter quickly and smush into the flour until you get pea sized butter pieces.
 Press into your pie dish and cover with plastic wrap. Keep the pie shell in the fridge until ready to fill.
 Next we are going to prepare the Salted Caramel. I like to use a heavy bottomed pot to make caramel like my brand new Le Creuset (thanks Mom!!). Because it is Cast Iron it heats more evenly...if you don't have one you can also use a stainless steel pot. Pour 2 Cups of Granulated Sugar into your pot. Shake the pot to make sure that the sugar is in an even layer across the bottom. Turn heat to medium and leave alone, but keeping a close eye.
 You will notice the sugar starting to carmelize...once you see that start slowly stirring the sugar, making sure all the sugar touches the bottom and melts.
 Once all the sugar has melted you really need to keep an eye on it. The deeper the colour of the caramel, the more flavourful...BUT sugar can easily burn so you need to be watchful!
 Once its a nice deep amber colour remove the pot from the heat. Put on a pair of Oven Mitts and be super fast and careful with this step. You are going to add about 1/4 cup of Heavy Cream to the hot caramel. You will need 1 Cup in total but since the caramel is so hot you need to gradually add it in small batches. Another tip is to pour the 1 Cup of Cream into a container and let it come close to room temperature before starting the process...that way the cream isn't so cold. So with your whisk in hand..add the 1/4 cup of heavy cream and whisk furiously right away..then slowly pour in the rest whisking very quickly so that the caramel does not harden.
 Lastly, add 2 tbsp of Butter and 1 Tsp of Grey Sea Salts. Whisk until thoroughly combined. Set caramel aside.
 For the filling you will need 4-5 Apples. I like using a blend of tart and sweet apples and in this case I used Fuji and Granny Smith. Peel and Core the apples.
 Thinly Slice them all. The thinner the better.
 And add 1/2 Cup loose brown sugar, 1 Tsp Cinnamon, 1/4 Tsp Nutmeg, 1 Tbsp Flour and 1 Tsp Lemon Juice. Toss to combine and also set aside.
 For the Cheese Filling combine 2 Packages Cream Cheese (Softened) with 1 room temperature egg until creamy.
 add 1/3 Cup Brown sugar and 1 Tsp Pure vanilla extract. Mix and scrap the sides of the mixing bowl to make sure thoroughly combined.
 Now you can (finally) assemble. In your cooled pie shell spread all of the cream chese mixture into the shell.
 Pour about 1 Cup of the salted caramel over the cream cheese.
 Now assemble the apple slices in a circular pattern. It helps if they are thinly sliced at this point!! Pop the tart into the oven at 375F for about 1 Hour or until the apples are thoroughly cooked and the shell has browned.
 A Piece of Art!
Slice and serve with a drizzle of salted caramel. I saved the leftover caramel in a tupperware container in the fridge and used it to drizzle over vanilla ice cream. This is why my jeans are tight....sigh.

Wednesday, December 7, 2011

Mexican Chocolate Tart

If you want a dessert that is sure to impress your guests (and all chocolate lovers), then you MUST try making a Mexican chocolate tart. The key to this tart is using good quality Mexican chocolate...or chocolate with chilli's. Don't worry...its not that spicy...but does have a slight zing when the chocolate is melting in your mouth! So good!

First start with your crust. Most chocolate tarts call for a chocolate wafer crust. I could not find chocolate wafers anywhere so opted for a graham cracker crust instead. Mix together 1 Cup of the crumbs with 2 Tbsp brown sugar, 1/2 Tsp Cinnamon, Pinch of Salt and 1/4 Cup Melted Butter. Press into a tart chell or pie dish and make in a 350F oven for about 10-12 minutes. Set aside to cool.

I had to go to a specialty food store to find Mexican Spiced chocolate...but I have seen Dark Chocolate with Chili at big box grocery stores as well. Both chocolates work well but the authentic Mexican Chocolate has a deeper flavour. You will need about 3 ounces of chopped Mexican chocolate and 4 ounces of chopped Semi-sweet chocolate. Set this aside. NOTE: If you cannot find Chili spiced chocolate anywhere just use all semi-sweet chocolate and add 1/8 tsp cayenne pepper to the mixture.
In a heavy bottomed pot bring 1 cup of heavy whipping cream to a simmer. Remove from heat.
Add the chocolate to the hot cream and whisk until all melted and combined.
Add 1/4 cup of unsalted butter in chunks and continue whisking slowly until combined into the chocolate.
Lastly, whisk in 2 Tsp Pure Vanilla Extract, 1 Tsp ground Cinnamon, 1/4 Tsp of Salt and a pinch of nutmeg.
Pour the chocolate filling into your cooled tart shell and chill until filling is set (about 1 hour)
Garnish and serve!