Just a little ole working gal, who loves food

Thursday, August 18, 2011

Breakfast Sandwich!

So yeah...its officially sandwich week as the only 2 posts that I came up with have been sandwiches. Not to say that sandwiches are bad...they are easy, fast and filling.
You just wait until next week...the recipes coming out of my kitchen this weekend will have you screaming for more ;)

My Cottage Style Breakfast Sandwich


Take two slices of whole grain bread and toast them. You can add a little butter to your toast.

 Top with fresh sliced tomato and very ripe avocado
 Fry up 1 egg, over easy. Season with salt and pepper
 Fry up a few slices of bacon too and add to the bread
 Top with the fried egg

There you have it. Super easy yummy sandwich!

Monday, August 15, 2011

Tomato Basil Mayo Sandwich

I have just returned from a week of relaxing at my in-laws cottage. It really was a whole week of doing nothing but float around in the lake on an inflatable raft and drinking beer. So obviously not a lot of fancy cooking happened, and the fancy cooking that did occur were repeat recipes already on the blog. So today I have something super simple, yet refreshing after a week of empty carbs!

 My first inspiration for this sandwich was my garden. After coming home from our vacation I was greeted by perfectly ripened yellow tomatoes and huge bunches of basil.
 In a bowl combine 1 heaping tbsp light mayo with 1 minced garlic clove and about 7-10 leaves of basil, minced. Season with salt and pepper.
 A dash of fresh lemon juice would have been lovely in this as well..but I didn't have any lemons :(
 Slice up your tomato
 Toast 2 slices of whole grain bread and spread some of the basil mayo on it...the more the better.
 Top with your gorgeous sliced tomato
Slice in half and devour. Yum!

Tuesday, August 9, 2011

Spicey Sausage Pasta Bake

I know its Summer, and its hot, and all you feel like making is hot dogs and salad, but sometimes a hearty meal is needed to spice things up. I would definitely make this casserole in the winter months...
but for now..it fed my husband and I for 4 straight days.
That means I didn't have to cook for 3 of them...which was heavenly for me!

 In a large pot sweat 1 chopped onion in 1 tbsp olive oil. Season with a little Salt and Pepper too.
 Once the onions are well on their way add about 1 tbsp minced garlic and 1 tsp minced rosemary.
 To the onions add 1/2 lb spicy pork sausage meat (you can usually find this out of the casings in your grocery store) and 1/2 lb extra lean ground beef. Cook until meat is browned and add 1 1/2 jars of prepared marinara sauce.
 Here is a little tip for all you spaghetti sauce makers. You know when you are left with the Parmesan cheese rinds and you just throw them out??? DON'T!! Freeze those suckers and when you are making sauce just chuck them in for extra yummy flavour city! I had 3 rinds in the freezer and threw them all in. Let this simmer for about 45 minutes to an hour.
 When the sauce is complete boil 3/4 of a package of Rigatoni. I boiled the whole thing and it was wayyy too much. Drain the pasta when it is cooked to al dente.
 In a deep lasagna pan spread a little of the sauce on the bottom
 Add a layer of the Rigatoni. You are totally welcome to arrange them neatly in rows for optimal presentation here...however, i was hungry and just dumped it on.
 Now add about 8 slices of provolone cheese
 and 3/4 cup of sour cream.
 Top this with 1 cup of cottage cheese...you are probably thinking that this sounds kinda weird..trust me..
 Top with a boat load of meat sauce
 now add the rest of your rigatoni

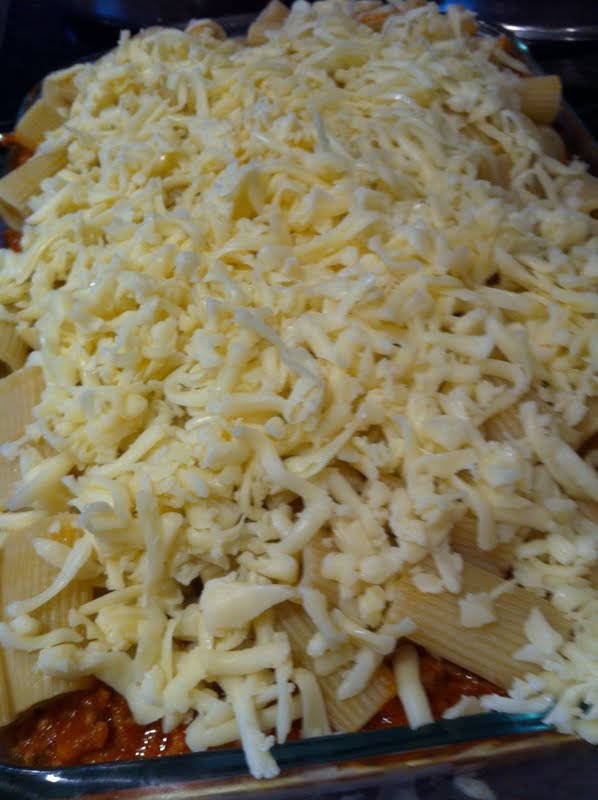
 2 cups of freshly shredded Mozzarella cheese
 More sauce
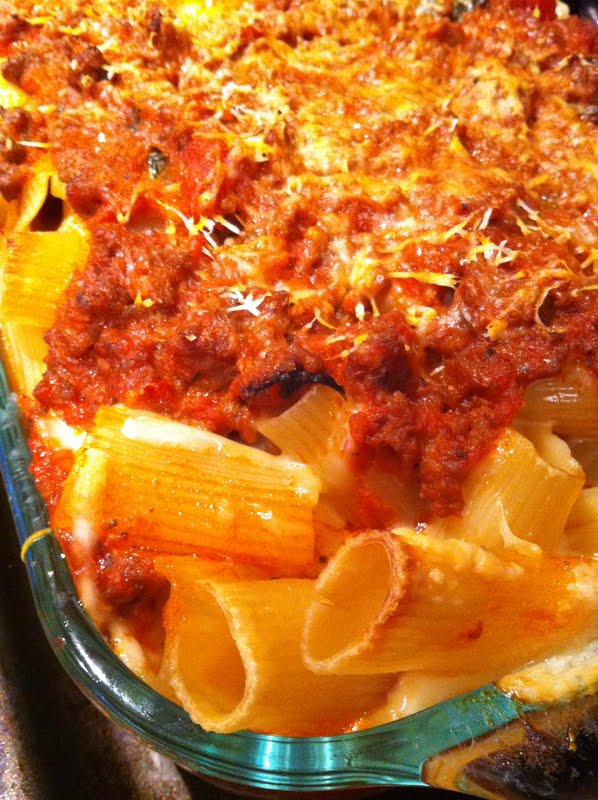
 Top  with Parmesan Cheese and bake at 350F for 30-45 minutes.

 So cheesy
Try this baby out...you will not regret it!

Friday, August 5, 2011

The BEST chocolate cake recipe EVER!

Baking truly is an art form. I find that some people can bake and it comes naturally to them...and for others...well...they go through a few batches of burnt cupcakes before perfecting a recipe.

I fall in the first category where I change recipes I find in cookbooks and websites all the time and very very rarely do they ever fail. Don't get me wrong, when i first started baking there were a few cakes that fell, or had about 25 toothpick holes in them from me checking to see if they were done. But now...I can say I am pretty confident with my baking skills!

I like to cook...and cooking food is something that I always find I need practice in, but baking is my niche. If I could...I would bake everyday...but my co-workers, husband and butt would all hate me forever. So for now, I will just bake on occasion and make super tasty amazing goodies!

I don't own too many recipe books. My main reason is that I own a few staples that have fantastic recipes in them, or they are given to me as gifts, and I just tend to refer to these same books. This one, is one of my favourites!

This woman is such a fantastic cook (and she has a love affair with butter!)

Her chocolate cake recipe in this book has got to be the best one I have tried to date. It is moist, really chocolaty and pretty easy to make. This time I used this recipe to make cupcakes, only thing I altered was the cooking time and I made a different icing.

In a stand mixer combine all your dry ingredients. You will need 1 3/4 cups of Unbleached All-purpose flour, 2 cups Sugar, 3/4 Cup Cocoa Powder, 2 Tsp Baking Soda, 1 Tsp Baking Powder and 1 Tsp Salt. Make sure your baking soda and baking powder aren't 10 years old..I find it to be key in baking that you use fresher active ingredients.
In a separate large bowl combine your wet ingredients. This recipe calls for buttermilk. Now buttermilk is not something that I keep in my house. Other than the odd baking recipe I never use it. A perfect substitute is 1 Cup 2% milk and 1 tsp White Vinegar. Works like a charm every time! You will need the full 1 cup of substitute Buttermilk (or real if you have it), 2 extra large eggs, 1/2 Cup vegetable oil and 1 tsp Vanilla. Whisk to combine.
Slowly add the wet ingredients to the mixer with the dry ingredients and mix until combined, scraping down the sides to make sure everything has been mixed in. Only mix for a couple of minutes...over mixing your batter will result in your cake falling.
Lastly add 1 cup of hot coffee. I just made a cup of instant coffee and it worked great. Once the cake is cooked you don't taste the coffee..it just gives depth to the chocolate flavour in the cake. If you are feeding this cake to children, use a decaffeinated instant coffee. As I mentioned earlier, this is a cake recipe, so if you are making a cake out of this, butter and flour 2 cake pans and pour the batter into both. Bake at 350F for 30-40 minutes.
But I made cupcakes!! I still baked these at 350F but for 12-15 minutes.
Yum!! Once out of the oven allow the cupcakes to cool in the pans for about 15 minutes. Then remove from the pan and allow to cool further before frosting.
I decided that the best frosting for a super chocolaty cupcake would be one with peanut butter. Who doesn't like chocolate and peanut butter? In your mixer combine 1 package cream cheese with 1/2 cup smooth organic peanut butter, 1 cup icing sugar, 2 tbsp milk and 1/2 teaspoon vanilla extract. You really want to use a peanut butter that is just 100% peanuts and does not contain anything else in it. Trust me.
Mix on high until combined and fluffy.
Pipe the icing on your cooled cupcakes and devour!
These were a hit and even the ones I left without icing were all gobbled up!
These can also be stored in the fridge for up to 1 week....if they last that long ;)

Thursday, August 4, 2011

Chicken Stuffed with Mushrooms and Brie

I have a super amazing cake recipe on deck for tomorrow (sorry...still editing some photos) but in the meantime here is a go to chicken recipe in our house when we want to think we are eating slightly healthier than normal (I actually am not a fan of chicken...which is why I always stuff it with good stuff!)

Chop about 3 cups worth of mixed mushrooms and add to a hot skillet with 1 minced onion and 1 tsp olive oil.
Season with salt and pepper and saute.
When onions start to turn translucent add 1 tsp chopped fresh thyme and 1 clove minced garlic. Cook until mushrooms have turned slightly brown. Set Mixture aside.
Butterfly 5 chicken breasts and season with salt and pepper. Add a generous scoop of the mushroom mixture.
And two fat slices of Brie Cheese...mmmmmmmmmmm Brie. The more the better!
Roll up the chicken breasts and place in an oven safe casserole dish. If you have any extra mushroom mixture you can just sprinkle it over the chicken breasts with about 1 tbsp of olive oil. Place the chicken in a 350F oven for 30-40 minutes or until chicken is cooked through. This should make a little bit of gravy on the bottom as well.
Serve with baked asparagus!

Tuesday, August 2, 2011

Ricotta Stuffed Zucchini Blossoms!

I have been watching marathons of the food network lately and noticed on an episode of Iron Chef that not only are zucchini blossoms edible...they are supposed to be delish. And boy are they right. They have a slight zucchini flavour to them and when stuffed with ricotta and deep friend...you have hit a completely new level of food love.

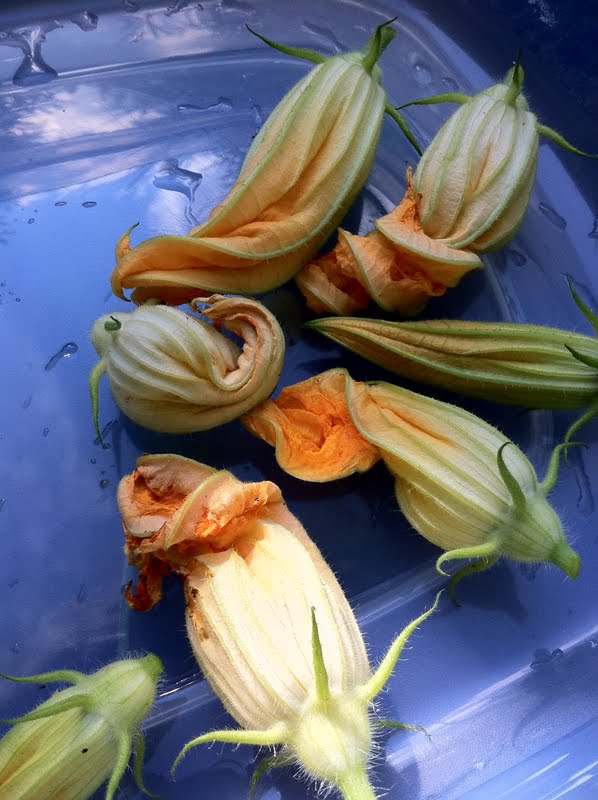
 So after doing a little research on zucchini blossoms I learned that there is a female blossom and a male blossom. The female blossoms will taste a little stronger than the males, as the females turn into the actual zucchini. You can tell the difference in the stems as the male blossoms have a thinner stem than the females. I used all males in this dish.
 Because I picked all the blossoms in the evening the flowers were closed. I just carefully pulled down the flower petals one by one to open...and snipped out that stem in the middle of the flower.
 To prepare your filling, take 1/2 Cup Ricotta cheese, 1 tbsp Romano cheese, 1 tsp minced fresh basil and 1 minced garlic clove. Stir to combine and set aside.
 Prepare your batter. I used 1/2 cup flour to 1 cup water. You want the batter to be kinda soupy and not thick at all. Add more water if you like.
 Using a piping bag stuff your blossoms with the ricotta mixture and twist the petal tips together.
 At this point you want to get your oil heating up in a deep saucepan or pot. It is hot enough when you drop a bit of batter in the hot oil and the drop rises and floats on the oil. I had my heat set to medium-low.
 Dip your stuffed blossom in the batter
And carefully place in the hot oil. cook for about 2-4 minutes or until batter has turned a light brown. No need to play with it while it is frying as you don't want the stuffing to fall out. When complete lay on a sheet of paper towel to drain off any excess oil and season with sea salt. Serve immediately!
 I didn't even let my husband try any of these...I ate them all myself they were that good!