Just a little ole working gal, who loves food

Thursday, March 31, 2011

Salt…It needs more love

I’ve noticed recently that poor salt has got a really bad reputation of late.
Have you ever seen this guy?

You may remember him from the Sidekicks commercials last year. I always felt bad for the little guy. Gotta say goodbye to the little salt man myself…and helllllooo to Fancy Seasalts!
Truthfully, we haven’t used Iodized table salt in a number of years now. Kosher Salt has been the main fixture in my pantry, but in the past year a few more have joined the salt party.
Say hello to my friend French Grey Seasalt

Isn’t he gorgeous? He tastes amazing on pretty much everything.
And the Beautiful Miss Bolivian Rose Salt.

She looks fine on fish and poultry.
Then we have Mediterranean Sea Salt. My favourite on steamed edammame.

And here comes the Original Sea Salt. He permanently lives in my salt Grinder. He comes out in a lot of my dishes as well.

Altogether they make a fine family in my spice cupboard!

Tuesday, March 29, 2011

Thats right ladies...my husband cooks too!

Brads Prime Rib
I tend to leave the meat cooking in the family to my husband, Brad. He is excellent in this field and it also gives me some time out of the kitchen.
He made the most amazing prime rib ever for my father’s birthday celebration which we served with the Risotto I posted last week. It was so tender, juicy and flavorful. Even my Portuguese grandmother was amazed at my husband’s culinary skills!
Here is his foolproof Prime Rib (I apologize in advance for the lack of measurements...my husband measures by the handful like most "Real Men").
Pre-heat oven to 500F
In a deep roasting pan spread out some Fresh Thyme & Rosemary Bunches   (about a fistful of each). Cut 2 Shallots in half and 1 whole head of garlic in half and add them to the herbs. Drizzle with Olive oil, Kosher Salt and Fresh Ground Pepper. This is the bed that your prime ribs will cook on. It gives amazing flavor to the Beef.

Now, take 2 prime ribs (at room temperature) and rub them generously with Kosher Salt and Pepper. Really rub it in on all sides and into every fold. We had 2 Prime Ribs because we were feeding a small army. You are welcome to use one like a normal family would.
In a bowl, mix some Grain Mustard, Honey Dijon Mustard, Dijon Mustard and Horseradish. Equal parts of each. Now slather this mixture all over the roasts…really rubbing it in again. Put the roast into the pan on top of the bed of herbs and drizzle with olive oil.
Place the roast in the oven for 15 minutes at 500F. After the 15 minutes your home will start to smell very strongly like rosemary. Now lower the temperature to 250F and slowly roast the prime rib for 2.5-3 hours or until your meat thermometer reads medium rare. I highly recommend the use of the thermometer. Remove the roast from the oven and let, rest tented with tinfoil, for about 20 minutes.
The slow cooking gives the roast an amazing crust on the outside..and super juicy on the inside! 
Slice and serve.

So this is the time that I ask you all...how do you like the blog? Am I posting enough? Not enough? No recipes you are interested in? Leave me some comments below and let me know what you think...I would love some feedback!

Monday, March 28, 2011

Jelly

While at the Wine and cheese show I had my first real encounter with jelly spread. They served me a cracker with roasted red pepper jelly. Totally afraid, I closed my eyes and popped the whole cracker in my mouth. I was sort of waiting for a gross texture and weird taste to envelope me since Jellies have always weirded me out. This is most likely because I have always associated Jellies with..well..Jello. And that is a dessert for kids…not an appetizer for adults! Well my friends, I have been proven wrong. SO WRONG. I am in love with this delicious sweet, salty, spicy mixture. I had to have it. So while out on my grocery trip I went to the gourmet foods isle and found this beauty.

Gourmet Red Chili Spread..mmmmmmm
I tried it on EVERYTHING when I got home. Rice crackers, Old Cheddar (my fave), even with a slice of leftover prime rib. THIS is my favourite new condiment. I recommend you go get yourself some today!

Now if only my husband will get on this boat…he still thinks it looks disgusting.

Saturday, March 26, 2011

Bacon and Chive Risotto=LOVE!

So before i start this post I have to show you what I woke up to on Wednesday morning (that and a killer flu bug).

Yeah...what the hell Mother Nature!!! I was all ready for spring and you drop this bomb? Not Cool!
Anyhow, on to the recipe...
We celebrated my dads birthday last weekend with a dinner at our place. We wanted something hearty, warm, filling and talked about. Risotto totally fit the bill…especially with the 2 prime ribs we cooked (recipe to come!).
The Key to Risotto is patience…you can’t rush it so no cranking the heat on this one! Its also best served immediately…so you can prepare it up to a certain point and set aside…but I have honestly never done this…if I make this, lets eat it damnit!
Bacon and Chive Risotto
1 Cup Arborio Rice (It HAS to be this type of rice. All Grocery stores carry it)
1 Cup White Wine
4-6 Cups Low Sodium Chicken stock, simmering on the side (I had frozen stock from when I made the roast chickens last week…extra flavor!)
6 Slices of thick cut bacon, cut into small bite size pieces
Handful of Chives
1 Shallot, Minced
5 Sprigs Fresh Thyme
Butter (at least a half cup)
½ Cup Fresh Grated PARMIGIANO-REGGIANO
Salt and Pepper

In a large deep saucepan cook your bacon until crisp.

Set bacon aside, drain pan of fat but leave a tiny bit. Do not clean the pan..you want the bacon juices and bits still on the bottom.
Set heat to medium high and add 2 Tbsp of butter to pan. Once butter is melted add Rice. Stirring constantly listen to the rice. You will hear it start crackling. This crackling is the rice releasing its starches, you want this to happen so that when the rice starts to cook it gives the risotto the creamy consistency that you want. So after it has been crackling for a couple of minutes add, the shallot. This is a good time to season with Salt and Pepper. Stir to combine and sweat the shallot. Now, stand back and add the wine. It will steam and bubble. Keep stirring. Once all the wine has evaporated, lower the heat to medium and start adding your simmering chicken stock one ladle at a time, stirring occasionally until all the liquid is evaporated, then adding another ladle.

You want to keep stirring so the rice does not stick to the bottom. Keep on doing this until the rice is al dente. The best way to do this is to take a grain of rice and to bite it in half. If you see a bright white pin in the middle of the grain you are good to go.
At this point remove pan from heat. Add in the cooked Bacon, Chives, Thyme and 2-3 tbsp of butter in chunks.

Mix thoroughly until butter is melted and risotto is creamy. Finish, by mixing in the Parmesan and adding more chives to garnish. This will knock your socks off!
Here is the finished product served with Prime Rib and Asparagus. Bon Appetite!


Friday, March 25, 2011

Toronto Wine and Cheese Show

Toronto Wine and Cheese Show…
Or better known as we want to get as many sponsors as possible into the International Centre and Charge you a fortune Show. Lots of wine…not so much cheese.
Yeah….Not as great as I thought it would be.
This is what I expected:
 I wanted interesting wine and cheese pairings offered by local and international wineries.
What I got:
Some free cheese from the Metro Grocery Store Booth, some limes and my photo on the Corona website, and out about $50 for some mediocre wine.
HOWEVER, I did have fun at the show. I had good company with me and we did try to taste a number of wines (1 to 2oz poured per drink ticket) that we had not tried in the past. I came home with a few new wines I wanted to find at the local LCBO and a lovely hangover the next morning.
Here are some snaps of the event. I still can’t believe I paid the equivalent of $4 for the Chocolate Covered Strawberry...4 glasses of wine can cloud your judgment.

 Gotta love the free Swiss Cheese!
 More Cheese!
 What the wine made me crave...it was pretty amazing!
 Some delish wines!
Taking a break towards the end of the evening! (Me on the right!)
Thanks for the company Amy!

Wednesday, March 23, 2011

When Life gives you Key Limes...

When Life Gives you Key Limes….
Make yourself some Key Lime Pie!

Key Lime Pie is my all-time favourite dessert. I have never been a huge fan of cakes. So, creamy, rich pies are where my heart lies! This recipe is fairly easy….except for the juicing of the limes. If you have a Whole Foods Market nearby I highly recommend buying a bottle of Key Lime Juice from there, where I live there is no Whole Foods or any other sort of organic supermarket (which is the only place I have seen the key lime juice). However I did manage to find bags of key limes at my local grocery store, and a whole bag juiced gives me the ½ cup that I need. Prepare for sore fingers!!

Key Lime Pie
Filling:
1 14oz can of Low Fat Condensed milk
4 Egg Yolks
½ Cup Key Lime Juice
Zest of 3 Key Limes (If you buy the Juice, then just use the zest of 1 Lime)

Pie Shell:
1 1/2 Cups Graham Cracker Crumbs
5 Tbsp Melted Butter
1 Tbsp Brown Sugar

Pinch of Salt
Preheat your oven to 350°F.

Stir together graham cracker crumbs, brown sugar, butter and salt in a bowl until combined well, then press mixture evenly onto bottom and up side of a 9-inch glass pie plate.
Bake crust in middle of oven 10 minutes and set aside to cool. Leave the oven on.
While your crust is baking start juicing your Key Limes.

Here are the lovelies.


And the after they were juiced.


You could be smart and use a hand held juicer, but I don't have one. So I use all my finger muscles to juice them by hand.

Whisk together the condensed milk and yolks in a bowl until combined well. Add juice, zest and whisk until combined.


Pour filling into the slightly cooled crust and bake in middle of oven 15 minutes.

This was the point where I started salivating.


Cool pie completely, then chill, covered, at least 8 hours.


AMAZING!

Tuesday, March 22, 2011

What to look forward to!

I have a bunch of new recipes coming up (Key Lime Pie, Bacon and Chive Risotto, Horseradish Prime Rib) as well as a review of the Toronto Wine & Cheese Show and some other cooking and entertaining products I love.
I am working on editing some of the snaps I took and will hopefully have a delicious posting up this evening!

Thursday, March 17, 2011

So Chickens were on sale…


And we can’t help ourselves when a bargain arises!!
Whenever we have roast chicken at our place it turns into a weeklong meal. There is only the two of us after all so 1 roast chicken goes a long way..never mind 2. My husband convinced me to cook both of the chickens at once. Pleading that it would save him from trying to figure out what to make for lunch all week and we could freeze the chicken soup that we would make with the leftovers. Let me just say that we now have enough chicken soup to feed the Canadian Army. Thank god for the basement deep freezer.
2 Roast Chickens with Roasted Root Veggies
Ingredients:
2 Roasting Chickens, Rinsed and pat dried.
1 Lemon, Cut in half
1 Head of Garlic, Cut in half so cloves are exposed.
Salt, Pepper, Thyme, Rosemary, Sage (Fresh if you can find it..I only had dried L)
1 ½ Cups Baby Carrots
2 Large Onions, cut into quarters
3 Celery Stalks roughly chopped
Olive Oil

Pre-heat Oven to 475F.
In a large roasting pan, assemble chopped veggies and cover with olive oil. These veggies add flavor to the soup we made after we finished with the chickens. Place Chickens on top of Veggies and season with Salt, Pepper, Olive Oil, and Fresh or Dried Herbs. Stuff the Cut lemon into the cavity of the chicken with the Garlic Head. Do the same for the second chicken.
Now my husband SWEARS by this Poultry seasoning called Old Bay

…so before I threw the chickens in the oven he covered the chickens in this spice. I find when they are roasted they taste exactly like a certain famous Rotisserie Chicken…maybe this is their secret!!

Now the oven should be pre-heated…lower the temperature to 400F and place the chickens in the oven. Let roast for about 1 Hour 20 Mins, OR use a meat thermometer inserted between the leg and breast to tell you when these babies are done.
While the chickens are roasting I usually chop up some sweet potatoes, regular potatoes, carrots and onions..toss them in some olive oil, salt and pepper with some of the fresh herbs used in the chicken and throw them in the oven as well when there is about 45 minutes left for the chicken.
When the chicken is done remove from oven and tent with tin foil. Let rest for about 15 minutes.
Voila, perfectly roasted chickens!

Tuesday, March 15, 2011

Breakfast for dinner

I could eat breakfast items for every meal every day. There is just something so sweet, salty and savory with breakfast that makes me crave it. You will see, at least once a week ,on our dinner table, Bacon and eggs. However, last Tuesday,in honor of Pancake Tuesday, I decided to fancify our breakfast dinner.
Low and behold…Whole Wheat pancakes with Bananas and Pecans. And to help make it a little better for us…I added a scoop of vanilla whey protein powder to the mix. Adds a punch of protein into a mostly carb filled meal! We also baked our bacon on a boiler pan to make it extra crispy. So fancy!
Whole Wheat Pancakes with Bananas & Pecans

1 ½ Cups Milk
2 Tbsp White Vinegar
½ Cup All-Purpose Flour
½ Cup Whole Wheat Flour
2 Tbsp White Sugar
1 Tsp baking powder
½ Tsp baking soda
½ tsp salt
1 Egg
2 Tbsp Butter, Melted
1 Banana Mashed
Pecans
Combine the Milk and Vinegar and set aside for  5 minutes. This will allow the milk to sour and simulate buttermilk.
Combine all the dry ingredients in a mixing bowl. Whisk your egg and cooled melted butter into the milk mixture. Pour the dry ingredients into the wet ingredients add mashed banana and whisk until combined and lumps are gone. Don’t over mix!
Pour ¼ Cup full of batter mixture onto your griddle (medium heat) and cook until bubbles pop on the surface. Flip and cook until browned.
Serve with warmed maple syrup, sliced bananas and pecans and bacon!

Thursday, March 10, 2011

Pantry Envy

I wish, wish, wish I had a kitchen large enough to install a walk-in pantry. I dream of being able to organize all our pantry items in a beautiful array of food glory. But, we purchased a 1970's side split with a galley kitchen..no room for pantry in there...in the meantime I can dream of the day I win the lottery and can add square footage to our humble abode.

I love the ladder in this one!! It gives this pantry such a farmhouse feel to it!


I may have to borrow this idea of placing everything into clear jars and cannisters.
Especially for my spice cupboard!

Love the open shelving in this one!

Sigh...this one is gorgous...however does anyone really need that many lemons? Or apples? Staging much?

Tuesday, March 8, 2011

Ole!


My lovely west-coast dwelling sister-in-law introduced me to Mexican Lasagna back when my husband and I were in the early stages of our relationship. We went over to her place for dinner where she presented us with everything delicious layered into a casserole dish and baked for 30 minutes. I have been making this ever since and modify it to accommodate what I have in my fridge and pantry. Its super easy for a quick weeknight meal too!
Mexican Lasagna:
10-12 Flour or Corn Tortillas (If you can get Corn..they are sooooo much tastier!)
1Lb Ground Beef, or Ground Chicken or Turkey, whatever floats your boat!
1 Tsp each of Cumin, Chili Powder, Salt, Pepper, Paprika, Onion Powder and Garlic Powder. Or you can use pre-made taco seasoning J
1 Can Refried Beans
1 Can Peaches and Cream Corn, water drained
3 green onions, chopped
1 Jar of your Favourite Salsa
1 Jalapeno, minced
Lots of Cheddar Cheese, grated
1 Green or Redd Pepper, chopped
Fresh Cilantro to garnish
Sour Cream (1/2 Cup)
In a saucepan brown the ground beef…once cooked add spices and coat evenly…if mixture is a little dry add a little water and continue cooking until water is evaporated.
In a lasagna dish, Layer all the ingredients in whatever order you please. I like to layer in this order: Little salsa, tortillas, beans, corn, Beef, cheese,  tortillas, salsa, jalapeno, Beef, green pepper, cheese, tortillas, cheese, green onion, sour cream dollops.
Pop this bad boy into your oven at 375F for about 30 minutes or until everything is bubbling and melted.
Garnish with Cilantro.
You will thank me when you eat this! Happy Tuesday!

Friday, March 4, 2011

Beef Pot Pie...the way to any man's heart!

THIS is the most delicious Beef Pot Pie ever! I swear! Go make it! Right Now!
My husband had a craving the other night for something with a crust on it….didn’t care what it was…as long as it had crust. Oh, and it had to have meat in it. So I decided I would venture into a territory I had yet to explore. Meat Pie. Now these kinda scare me a little…they sound like a lot of work…and after a 11 hour day out of the house…I don’t feel like making a meal that would keep me in the kitchen for 3 hours. But alas, I wanted to dote on my hubs, and I began a frantic google search for the perfect Beef Pot Pie. I am not one to copy a recipe, I like to take inspiration from a number of recipes , mash them together and put my own spin on them.  I don’t have any photos of the finished product, the man of the house pretty much dove in as soon as it was out of the oven, but I have a lot of extra filling leftover and will make another on the weekend to do a photo shoot with. This meat pie needs its moment!
BEEF POT PIE
For the Beef Stew:
3Lbs Beef Rump Roast, Cut into 1” Cubes and pat dry
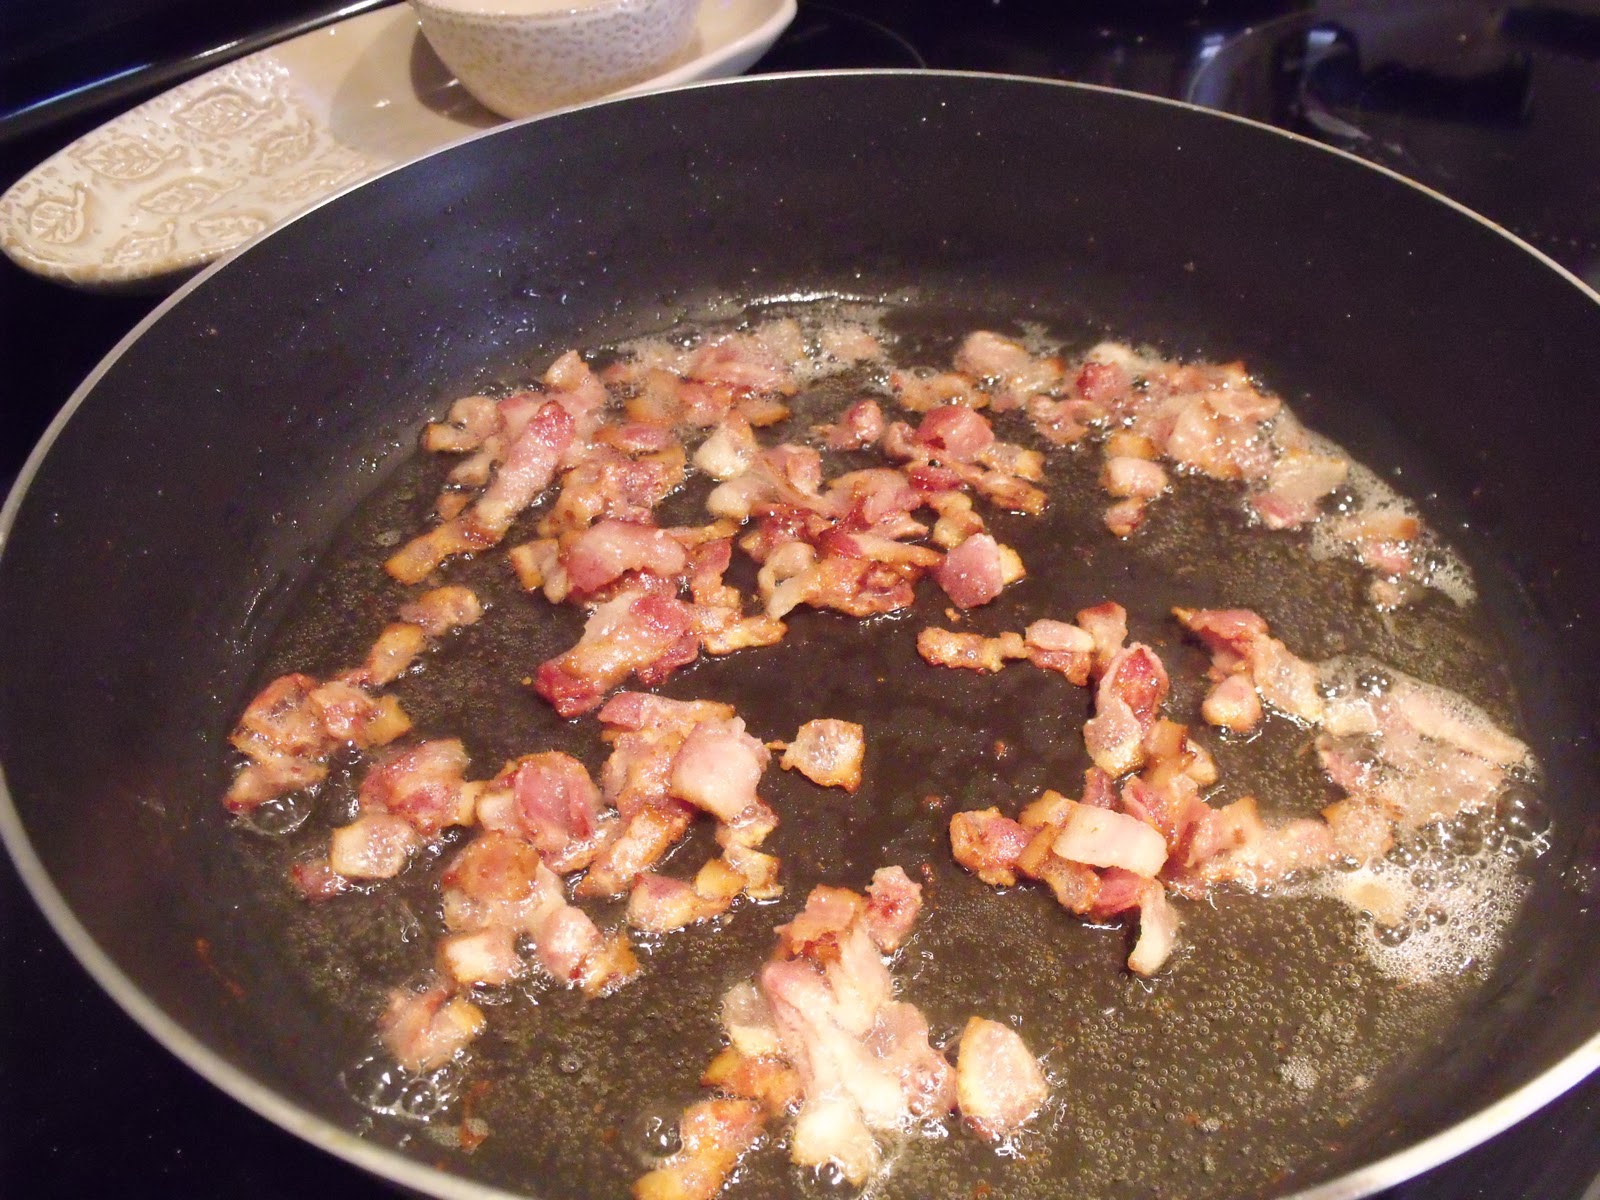
6 Strips Thick Cut Low Sodium Bacon, Cut into 1” Pieces
1 Spanish Onion, Minced
2 Medium Carrots, Peeled and Minced
1 Celery Stalk, Minced
1 Tbsp Minced Garlic
2 Cups Red Wine (I had a Cabernet Sauvignon that was already open so I used that, but a Chianti or Burgundy would be better)
4-5 Cups Low Sodium Beef Broth
6 tbsp Butter
6 tbsp Flour
3 Tbsp Tomato Paste
1 tbsp Fresh Thyme, 1 Tsp Parsley and 1-2 Bay Leafs
½ Tsp Cayenne pepper
Salt and Pepper to Taste
In a heavy bottomed pot, cook bacon until crisp. Remove Bacon, turn temperature to medium high and add Beef cubes directly into the bacon fat. Sear Beef until slightly browned (about 3-4 Minutes) and remove beef.  Add Minced Onion, Carrot and Celery into the same pot. Season with a little salt and pepper and continue to stir until onion is translucent. Remove Vegetables and set aside with Beef and Bacon. In the same pot at medium high heat, add the butter and wait until it is all melted. Sprinkle in the flour and stir occasionally until the flour, butter mixture turns a nice nutty dark brown..do not let it burn! Add back the Beef, Bacon and Vegetables and mix to make sure all is covered in the flour & butter mixture, about 1 minute. Add the Red Wine, Beef Stock, Garlic, Tomato Paste, Cayanne and herbs.  Stir well and lower heat to Low. Simmer for 3-4 Hours stirring occasionally. I didn’t have 3-4 hours the other night so I only simmered it for 1 hour. It still tasted pretty delicious! Just make sure you taste the gravy about half way into the cooking for seasoning.
For the Vegetables:
2 Large Carrots cut into ½ inch pieces
2 Large Yukon Gold Potato’s cut into ½ inch pieces
½ Cup Frozen Peas
While the stew is cooking, blanch the carrots and potatoes in Boiling Salted water for about 8 Minutes or until slightly softened. Immediately immerse the vegetables into cold water to stop the cooking. I dumped the frozen peas into this water as well to start the defrosting. Drain the water and Set Aside.
ASSEMBLY!
If you got this far you are almost done!
Preheat the oven to 400F
For the Crust I bought pre-made refrigerated Pie Crust. The box came with 2 crusts, one for the bottom and one for the top, I know…totally cheated but I work a full time job! No Martha moments here!
In a 4”deep round corningware dish, press down the bottom crust. Butter the bottom of some tin foil and place on top of crust, weighing it down with about 1 inch of dried rice or beans. When you pre-cook the crust this will keep it from puffing up too much. Bake bottom crust in oven for 8-10 minutes or until edges are slightly browned. Remove from oven, discard tin foil and rice/beans.
Back to the Stew, add your Blanched Vegetables to the stew and stir. If your gravy is a little too soupy remove some and freeze for another day. You want it to be chunky. Ladle stew into pie crust until you reach the top edge of the crust. Top the Corningware with your second piece of raw un-cooked pie crust. With a fork poke some holes in the top crust to let steam release. Return pie to oven for 15-20 Minutes or until top crust is a nice Golden Brown.
Let stand for 10 Minutes before Serving.
This recipe made enough stew for 2 pies. I froze the filling for the second pie for another day.
Hope you love this as much as Hubs did!

Thursday, March 3, 2011

Yay me!

My Name is Jenn, This is my first blog and I love food. Whether it is rich, unhealthy fatty deliciousness, or smart, healthy lean choices, I love it all and will blog it all.

Family and friends are always asking me for new recipes and takes on old time classics, or want to try something new and know my brave culinary skills..so why not spead my knowledge on the internet for all to see and follow. I have to admit...I am not a writer (I crunch numbers for a living), so there will be grammar errors...but no spelling errors because I just realized there is spell check on here..Thumbs UP!

So I hope I can inspire all with some delish recipes on here! I will try and post photos of the finished meal when I can!

First Dish to be posted tomorrow...Beef Pot Pie! Yum!