Just a little ole working gal, who loves food

Tuesday, April 26, 2011

Enchiladas!


This year I hosted Easter for my parents and the in-laws. And because it was at my house, and I get to choose what we are eating I decided to go against the grain and cook something completely not Easter related but equally as delicious as chocolate. That's right...as good as chocolate! Here is my take on Pork Enchiladas!

Take 1 or 2 pork shoulders and place them in a dish or pan.

Now add some spice to them! I usually add about a Tbsp each of the following: Salt, Pepper, Chili Powder, Garlic Powder, Cumin, Paprika, Dried Oregano. Then 2 Tbsp chopped garlic, 1 Onion chopped and 4 Tbsp White Wine Vinegar. Rub it all into the pork getting into every crevice and fold of the meat.
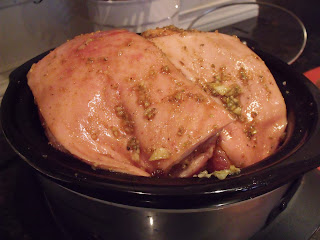
Now place the shoulders in your slow cooker. Well..I tried to anyways...my slow cooker was wayyyyy too small for these suckers.
See? Almost fit..but not quite. I removed them from the slow cooker and placed them back in the pan and in the oven at 300F for 6-8 hours. If using the slow cooker, cook on low for 8-10 hours.
When the pork is about 1/2 to complete..start your red sauce. You will need about 4 cans of Enchilada sauce.
But first..make your roux. To make a roux, on medium heat combine 2 Tbsp flour with some olive oil and whisk until combined. The roux will help thicken your sauce since you will be adding some chicken stock to it.
It should start to bubble up and look like this. Keep on whisking for a couple of minutes. It should start to give off a slightly nutty scent..do not burn!
Now add the sauce. Keep on whisking and reduce the heat to low. .

Add about 1 Quart of chicken stock to the sauce and reduce heat to low. Simmer for about 30 minutes. I like to add some chopped cilantro to the sauce at this point too!
By now the pork should be cooked. Let cool for about 20 minutes or until you are able to handle the meat.
Shred the pork by hand or with forks and place in a deep dish.
Now add some colour!! I like to add a can of black beans, some corn, and 2 cans green chili's! I have also added black olives in the past too!
Combine the ingredients and you are ready to start assembly!
In a large lasagna pan ladle some sauce on the bottom of the pan.
Dip your corn tortilla in the sauce
And fill with your pork topping, grated cheddar and Monterrey jack cheese, and some green onion.
Roll up the tortilla and place in the pan. Once you are finished filling and rolling the tortillas ladle the rest of the sauce over the enchiladas.
Top with more cheddar and Monterrey jack. Garnish with more cilantro and green onion and bake in a 350F oven for 30minutes covered and 10 minutes uncovered.
There you have it...an Easter feast!

Monday, April 25, 2011

Anti-Easter

I hope all you readers had a fantastic Easter weekend full of Lamb, Turkey and Ham. I however decided to go against the traditional Easter dinner train! That recipe will be posted tomorrow because my computer was being a pain in the you know what and wouldn't upload the photos of the wonderful feast I made!

In the meantime here is a super easy recipe if you want to impress your guests with something flavourful, tasty and pretty to look at!

Caramelized Onion and Bacon Tart

First, thinly slice 1 large or 2 medium size vidalia onions. In a sauce pan on medium high heat drizzle a little olive oil and add the onions.

Once the onion have been cooking for a few minutes and start to become a little translucent grab one of these...
And pour a little into the onion mixture...turn the heat down to medium low and saute, adding more beer every so often.
While the onions are caramelizing, grab a package of your favourite bacon. I prefer Maple glazed bacon myself.

Grab about 7-10 slices and roughly chop

Brown the bacon in a second sauce pan over medium high heat.


Set cooked bacon aside. Now back to those onions, by now they should be pretty caramelized and yummy. Add some chopped thyme and season with a little salt and pepper.

Now its time to get the Puff Pastry ready. I usually buy my puff pastry in the frozen foods aisle of my local grocery store. In the past I have purchase pre-rolled sheets of it...but this time they didn't have any of that. So the puff pastry that I bough came in a little square package that I had to roll out myself. Hence the ugly shape of the dough below

Whatever...it works. Make sure your pan is lightly greased and floured before setting the pastry on it. Next add those caramelized onions, then the bacon

Lastly, get yourself some creamy chevre.
Crumble the chevre over the bacon and onions. Sprinkle a little more fresh thyme on top as well
Now brush the outer edge of the puff pastry with egg wash and pop in the oven at 350F for about 25-30 minutes or until pastry is puffed up and slightly browned.

Now, normally i do have photos of the finished product..all fancified up on a plate...but as soon as this baby made it out of the oven, we sliced it up and started chowing down...totally forgot about the photo. Anywho...it was pretty tasty and my guests were not disappointed!

Hope you all had a great weekend!

Thursday, April 21, 2011

Creme Brulee!

If you want to impress your Husband, Wife, Boyfriend, Girlfriend, Parents, In-Laws, Boss etc...make them some creamy, silky perfect Creme Brulee.

I have tried many different variations of this recipe and this one never, ever fails me. It always comes out beautiful and silky, not to mention absolutely perfect!

Separate 8 eggs and save the egg whites for another time.

I usually freeze them and use them in egg dishes when needed.
Add 1/3 Cup superfine granulated sugar to the egg yolks
Now start whisking. Whisk and whisk and whisk until the egg mixture starts to
lighten in colour and all the sugar has dissolved.
Now add 1 teaspoon of PURE (not the fake stuff) Vanilla extract...or if you have one, use a real vanilla bean
Now add 2 Cups of heavy Cream...keep on whisking.

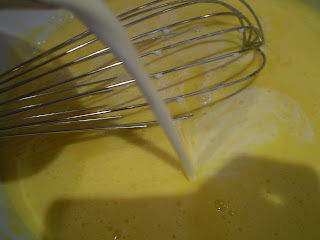
Whisk, whisk...and voila. The mixture should be a nice creamy yellow.


Skim off any bubbles in the mixture and divide into 5-6 ramekins. Place ramekins in a deep baking dish.

Now this is very important. Boil some water and add it to your baking tray. This is called a water bath. The water should come to about half way up the ramekins. Some find it easier to place the tray in the oven first then pour in the water.

Now bake in a 350F oven for 50-60 minutes. The creme brulee should still be a little loose in the middle. Remove from the oven and let cool in the water bath. Once cooled, remove from water and chill in the fridge for at least 2 hours.
When you are ready to serve, get out your hand held torch

I got this baby for Christmas a few years back. Totally handy for this dish!
If you don't own one you can just use your oven set to broil. Just make sure that your oven rack is set up close to the broiler as you don't want the filling to heat up too much. You just want to caramelize the top.
Now sprinkle about 1 tsp of sugar over the Creme Brulee...and fire them up..
careful not to linger too long on one spot.
Garnish with fresh raspberries! So amazing!


Tuesday, April 19, 2011

Grilled Sandwich

If there is ever a leftover grilled chicken breast in the fridge, and my husband hasn't proclaimed that it belongs to him, I make grilled sandwiches. They are fast, tasty and healthy! Here is my take on a Italian grilled chicken sandwich.

Take two slices of your favourite Artisan Bread (I like Whole Grain with Flax Seed) and generously spread some pesto on it. This is store bought pesto since my basil hasn't even been planted yet.
Next add some of that grilled chicken

Some beautiful sliced hot house tomatoes
and whatever else floats your boat. I added fresh baby spinach, avocado and fresh buffalo mozzarella cheese
now heat up your panini grill to the hottest setting. This thing is a godsend in the cold Ontario winter months when the barbecue is under 2 feet of snow.

Add a little olive oil to the grill

and place your sandwich on the grill.
 Lightly drizzle the top of the sandwich with olive oil as well...this will make it super crispy and tasty

And grill for about 5 minutes...flipping the sandwiches halfway

yumm!!!

Once the cheese is all melty and gooey, remove from grill and serve. You will be thanking me later