Just a little ole working gal, who loves food

Thursday, January 26, 2012

Oven Baked Tilapia with Garlic, Lemon & Parsley


Yayy!!! Finally a healthy recipe...well sort of...I did add a smidge of butter. But seriously..no one will notice that smidge. Anywho, fish kinda scares me. I love it, but after a few disasters of undercooked and overcooked fish (not by me, by restaurants..ugh), I tend to shy away from fish dishes. I ALWAYS buy my fish fresh, never ever frozen, EVER. The fresher the fish, the pricier it is in this neighbourhood...until you find tilapia. This bland whitefish is the most affordable. And since it really has very little natural flavour to it, the world is your oyster when it comes to being creative. But for starters, lets keep this fresh easy and light!
I like to give my Tilapia fillets a quick rinse first...then pat dry with paper towels. Chop 2 Cloves of Garlic, 1/4 Cup of fresh flat leaf parsley, and slice a lemon in half.
In a saucepan heat up (medium heat) about 4 tbsp of Extra Virgin Olive oil and 1 Tbsp of Butter.
Add your garlic and let it cook for a couple seconds until it becomes fragrant!
Now add your parsley to the party! Set this aside for now.
Throw your fillets into a cast iron oven proof pan on high heat. Let it sear for a couple minutes and pour the hot oil, garlic, parsley mixture over the fillets. Squeeze the juice of half the lemon over the fish and place in a 375F oven.
The fish only takes about 7-8 minutes to cook. You can tell once the fish turns fluffy and flaky. Serve over poached asparagus and roasted sweet potato's.

Wednesday, January 18, 2012

Shortcut Spicy Bacon Baked Beans

Ever feel like some spicy rich baked beans but don't want to soak your beans for 24hours, then boil them, thennnn slow cook them?? Well that is me 100% of the time...if I want me some baked beans...I kinda want them that evening...or now. So this little recipe is the cheaters version of spicing up canned baked beans.
Even though its a huge cheat...it is seriously so delicious!

In an oven proof dutch oven take about a 1/2 lb of Bacon. Cut each strip in half and fry until about 70% done. You want most of the fat rendered but you don't want the bacon to get to the crispy point just yet. Remove from your pan and set aside on some paper towels to cool.
If the bacon released a lot of bacon fat I would drain it until you have about a tablespoon left in the pot. Add 1 Chopped Onion, Half a Green Pepper Chopped, and 1 Jalapeno Minced to the bacon greased pot. Cook until Onions have softened and turned a light brown. Add 1 Clove of minced garlic.
I like to use a combination of flavoured baked beans. I used 3 Cans of Beans with Pork and Molasses and 3 Cans of beans with Pork and Tomato Sauce. Add all 6 cans to the pot.
Stir to combine and bring this to a simmer.
Now its time to flavour this up! I added about 3/4 Cup of Diana Sauce BBQ Sauce (Original), 1/4 Cup of Brown Sugar, 1/4 Cup Apple Cidar Vinegar and 1 Tbsp Dried Mustard. Season with lots of fresh Ground Pepper (I found this needed no salt since the canned beans already have plenty of it!)
Stir to combine everything and top the Beans with the half cooked bacon. I wish I used more bacon...next time I will use the whole pound of bacon! Throw the dutch oven into the oven (not covered!) at 325F for about 1.5 to 2 hours.
Once done the bacon will be crispy and the sauce will have thickened (if it hasn't it will once you take it out and let it cool for about 10 minutes. SOOOSOOOO GOOOOOD! TRUST ME!

Tuesday, January 10, 2012

Slow Cooker Pork Ribs

Ever feel like ribs in the winter but don't want to BBQ or Smoke them for 13 hours? Welcome the slow cooker! Equally delicious with zero work involved!
First slice your ribs into single rib portions and arrange 1 layer on the bottom of your large crockpot (about 6 Quarts)
I decided to make homemade BBQ sauce but store bought works just fine too. (I am still fine tuning this recipe and am not ready to post it just yet!)
Pour about 1 cup of the BBQ sauce over the first layer of ribs. Then add another layer of ribs and repeat.
In total I used 3 large racks of pork side ribs (Helllooooo Ribs on Sale!)
Set the slow cooker to LOW and let it do its thing for about 12 hours.
Once the Ribs were done I drained the fat then poured another cup of Fresh BBQ sauce all over. These fell clean off the bone and were super good with baked beans!!
Stay Warm...winter is coming!

Tuesday, January 3, 2012

A little Gift from me to you

Notice the new Printer Friendly Button Below??

Think of it as a little gift from me to you! Happy New Year!

Apple Cheesecake Tart with Salted Caramel

Happy New Year Readers!!

I hope that the holidays were good to you (but horribly bad on your waistline!) I have a lot of catching up to do with posting recipes...most of these coming up in the next couple of weeks are from the holiday season. After the catch up you will notice a much healthier theme...since my new years resolution has me back on the fitness wagon. I really felt every single one of the cookies I ate over the holidays with my first 2012 workout last night...ugh!

This Apple Cheesecake has the best of all worlds..tartness from the Granny Smith Apples, Sweetness from the Fuji Apples, Creaminess from the Cheesecake filling and sweet and salty from the Salted Caramel.


 For the Crust Combine 1 1/4 Cups Pastry Flour with 1 Tsp Brown Sugar and 1/2 Cup of Cold butter cut into cubes.
 Using your hands break apart the butter quickly and smush into the flour until you get pea sized butter pieces.
 Press into your pie dish and cover with plastic wrap. Keep the pie shell in the fridge until ready to fill.
 Next we are going to prepare the Salted Caramel. I like to use a heavy bottomed pot to make caramel like my brand new Le Creuset (thanks Mom!!). Because it is Cast Iron it heats more evenly...if you don't have one you can also use a stainless steel pot. Pour 2 Cups of Granulated Sugar into your pot. Shake the pot to make sure that the sugar is in an even layer across the bottom. Turn heat to medium and leave alone, but keeping a close eye.
 You will notice the sugar starting to carmelize...once you see that start slowly stirring the sugar, making sure all the sugar touches the bottom and melts.
 Once all the sugar has melted you really need to keep an eye on it. The deeper the colour of the caramel, the more flavourful...BUT sugar can easily burn so you need to be watchful!
 Once its a nice deep amber colour remove the pot from the heat. Put on a pair of Oven Mitts and be super fast and careful with this step. You are going to add about 1/4 cup of Heavy Cream to the hot caramel. You will need 1 Cup in total but since the caramel is so hot you need to gradually add it in small batches. Another tip is to pour the 1 Cup of Cream into a container and let it come close to room temperature before starting the process...that way the cream isn't so cold. So with your whisk in hand..add the 1/4 cup of heavy cream and whisk furiously right away..then slowly pour in the rest whisking very quickly so that the caramel does not harden.
 Lastly, add 2 tbsp of Butter and 1 Tsp of Grey Sea Salts. Whisk until thoroughly combined. Set caramel aside.
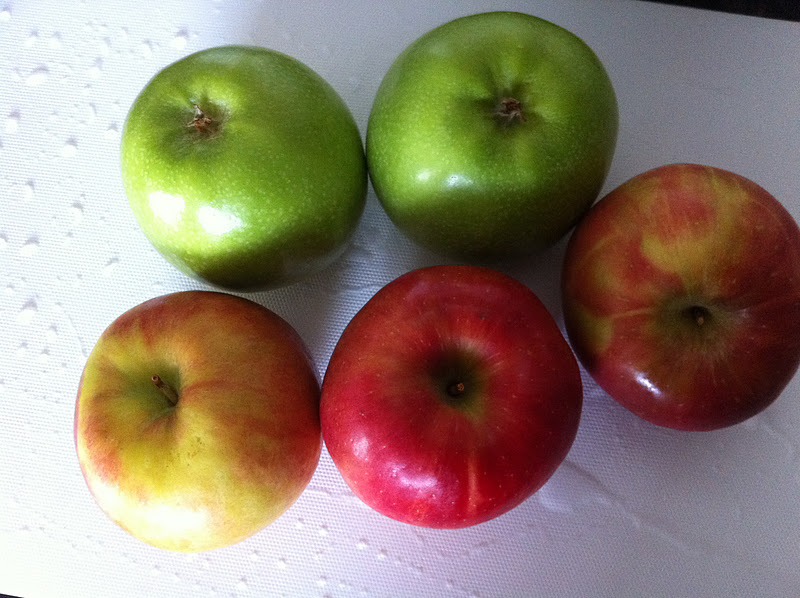
 For the filling you will need 4-5 Apples. I like using a blend of tart and sweet apples and in this case I used Fuji and Granny Smith. Peel and Core the apples.
 Thinly Slice them all. The thinner the better.
 And add 1/2 Cup loose brown sugar, 1 Tsp Cinnamon, 1/4 Tsp Nutmeg, 1 Tbsp Flour and 1 Tsp Lemon Juice. Toss to combine and also set aside.
 For the Cheese Filling combine 2 Packages Cream Cheese (Softened) with 1 room temperature egg until creamy.
 add 1/3 Cup Brown sugar and 1 Tsp Pure vanilla extract. Mix and scrap the sides of the mixing bowl to make sure thoroughly combined.
 Now you can (finally) assemble. In your cooled pie shell spread all of the cream chese mixture into the shell.
 Pour about 1 Cup of the salted caramel over the cream cheese.
 Now assemble the apple slices in a circular pattern. It helps if they are thinly sliced at this point!! Pop the tart into the oven at 375F for about 1 Hour or until the apples are thoroughly cooked and the shell has browned.
 A Piece of Art!
Slice and serve with a drizzle of salted caramel. I saved the leftover caramel in a tupperware container in the fridge and used it to drizzle over vanilla ice cream. This is why my jeans are tight....sigh.